

This post may contain paid links. See more info on my privacy page.
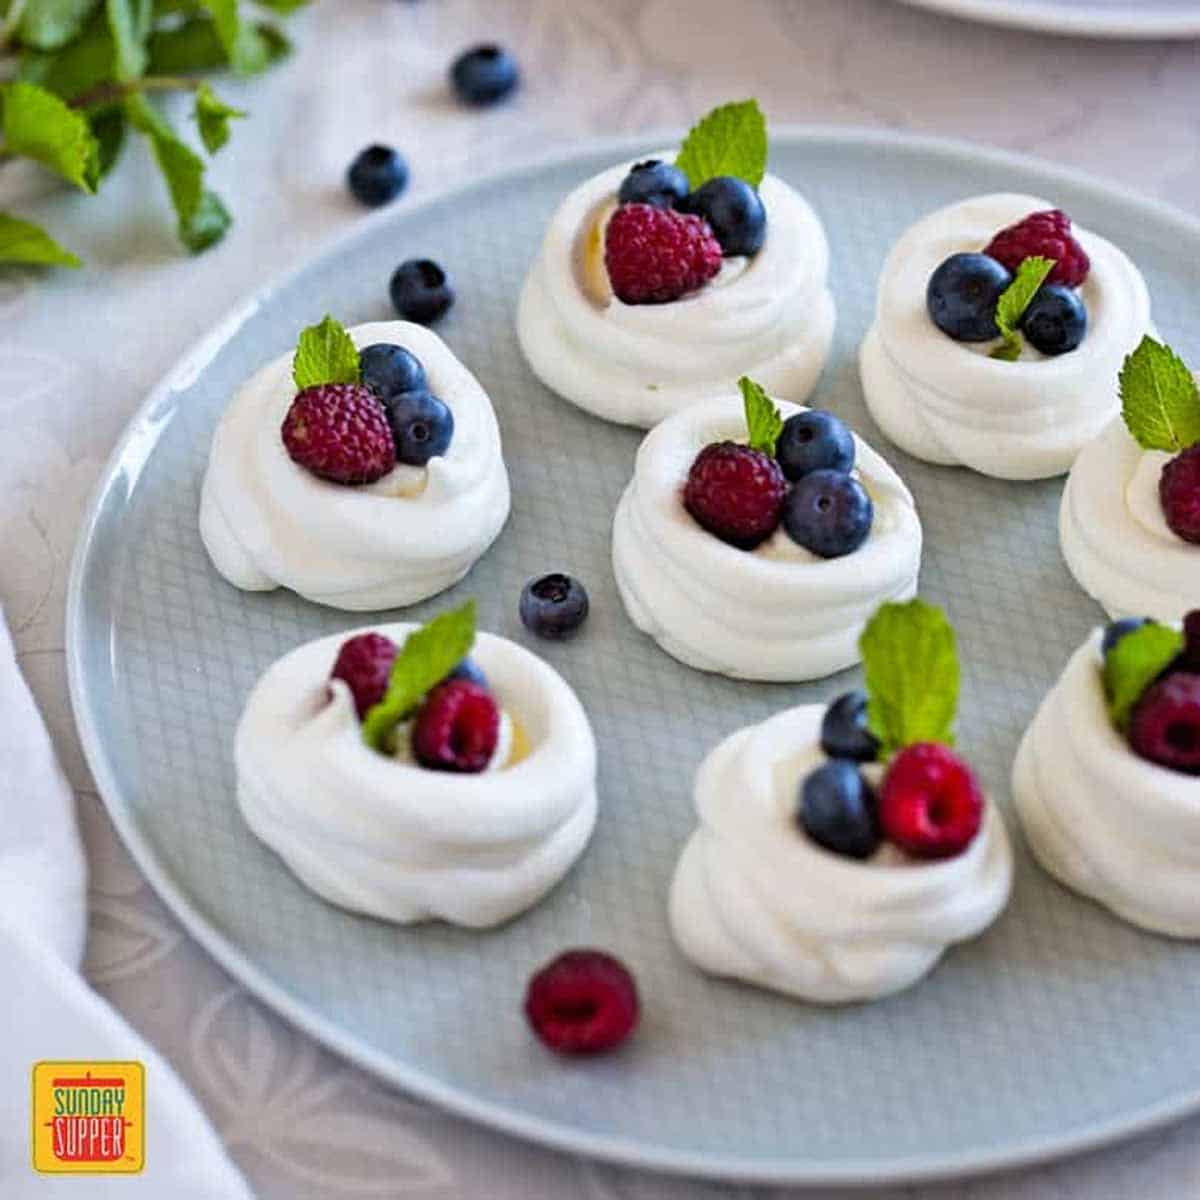
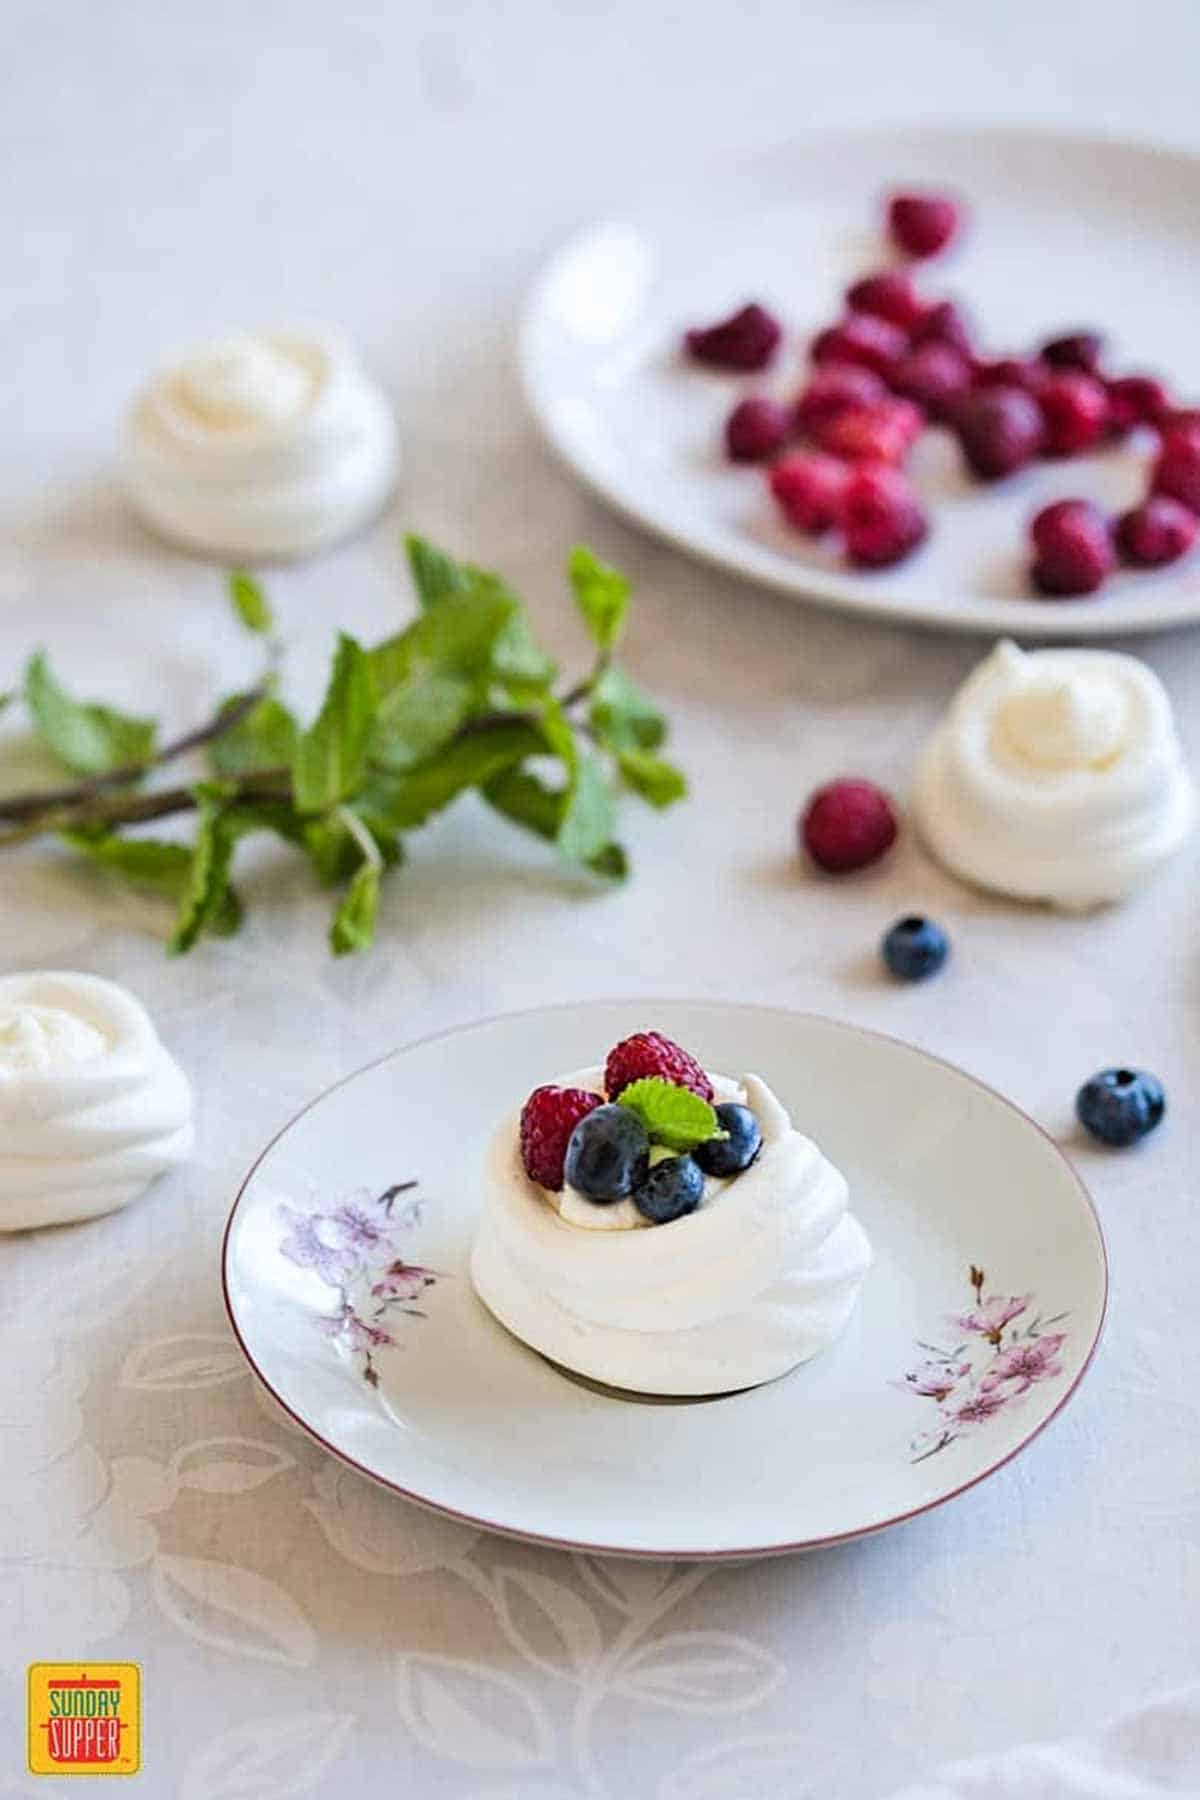
My Mini Pavlova recipe is a show-stopping, elegant dessert made with a light and airy meringue and a mascarpone filling finished with fresh berries. It is a gorgeous holiday dessert and perfect for parties, and it's easy to make, too!
So easy to make and such a show-stopper!
Sarah on Pinterest
Jump to:
Mini Pavlova
My individual pavlovas are just irresistible, made with mascarpone, homemade whipped cream filling, and light, crisp meringue cups, which are the perfect bite-size desserts to make if you want to impress family and friends. Everyone will be asking you to share the recipe, and they'll never believe how easy they are to make!
The most important part of this recipe is the pavlova meringue. A meringue recipe for pavlovas is made differently from a regular meringue. The best pavlova recipes are crispy on the outside and soft on the inside, which calls for adding cornstarch to the mixture!
This is a holiday recipe requested by my family year after year!
They were absolutely delicious and recipe was easy to follow. Thanks for a great recipe!
Claire on Pinterest
What are Pavlovas?
Pavlovas are a meringue dessert with a creamy topping and fresh fruits for garnish. It has a crisp meringue crust but is soft, creamy, and light on the inside.
Traditionally, it is served as one large cake, but I prefer pavlova bites! Pavlova is named after the Russian ballerina Anna Pavlova. It is a popular dessert worldwide, especially as a Christmas dessert!
Pavlova Bites Ingredients
- Egg whites: Make sure to only use the egg whites! If even a tiny drop of yolk gets into the mix, it will need to be discarded and the bowl wiped clean.
- Caster sugar: White sugar is a must. If you only have regular granulated sugar, blitz it in a food processor or blender until it's lighter and finer, but not powdered.
- Cream of tartar: A by-product of wine production, cream of tartar adds structure to the pavlova, keeping it from turning out flat.
- Cornstarch: Cornstarch helps make pavlova into pavlova, and not just meringue. It retains the soft, fluffy interior!
- Vanilla extract: A little vanilla helps flavor the pavlova with a gentle, delicious vanilla aroma.
- Whipping cream: Added to the marscapone, heavy cream makes for a creamy, rich filling that beautifully complements the meringue without overpowering it.
- Mascarpone: If you want, you can swap the marscapone out for honey goat cheese or ricotta, but marscapone will have the sweetest, lightest flavor.
- Fresh fruits: Your choice; I use berries, like raspberries and blueberries, as well as sliced strawberries when they're in season!
Mini Pavlovas Recipe
How to Make Pavlova Meringue
- Preheat oven to 320°F. Line two baking tins with parchment paper.
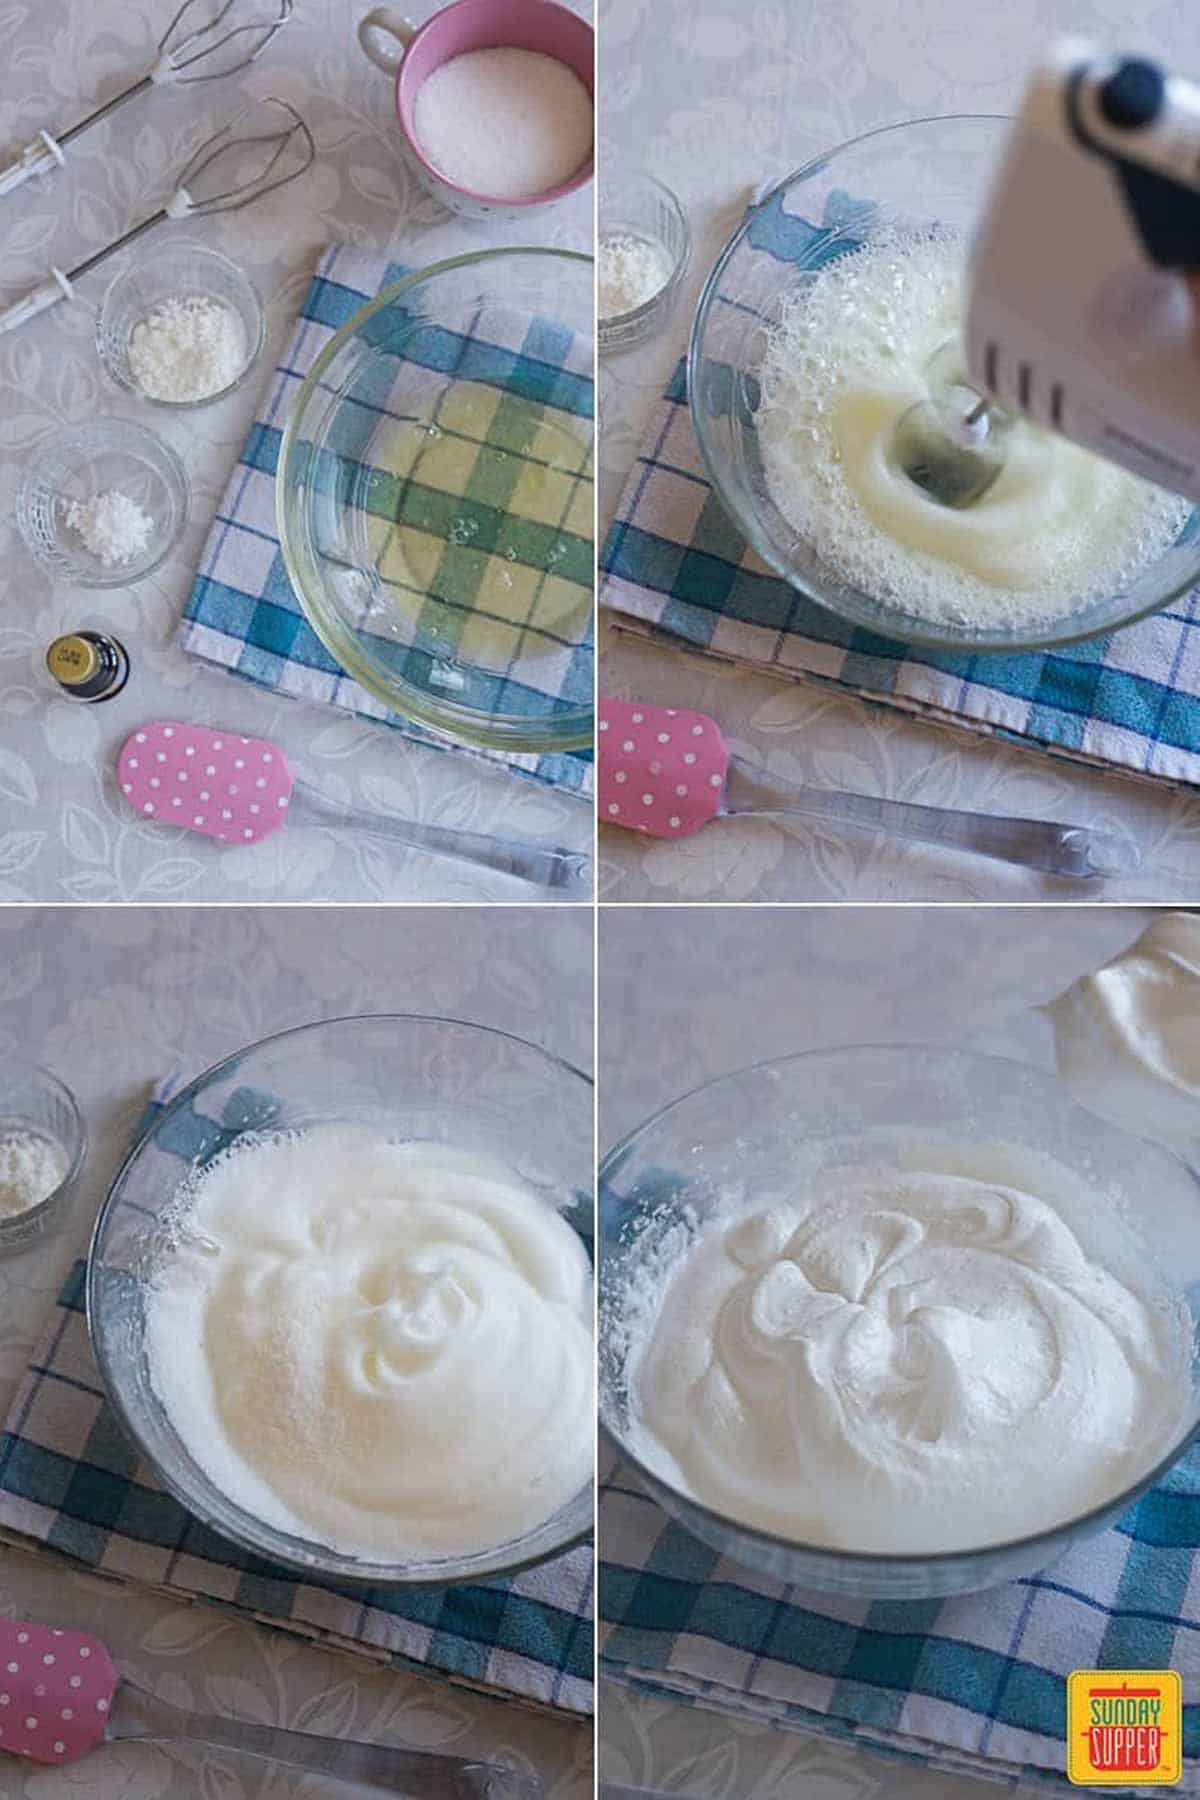
- In a large mixing bowl, using an electric mixer at high speed, beat the egg whites until soft peaks form. You can also use a stand mixer with a whisk attachment.
- Gradually add the sugar and the cream of tartar and keep beating at high speed. Add the cornstarch and vanilla extract. Beat until stiff peaks form.
- Scrape the meringue into piping bags, or a ziplock bag with a corner cut out.
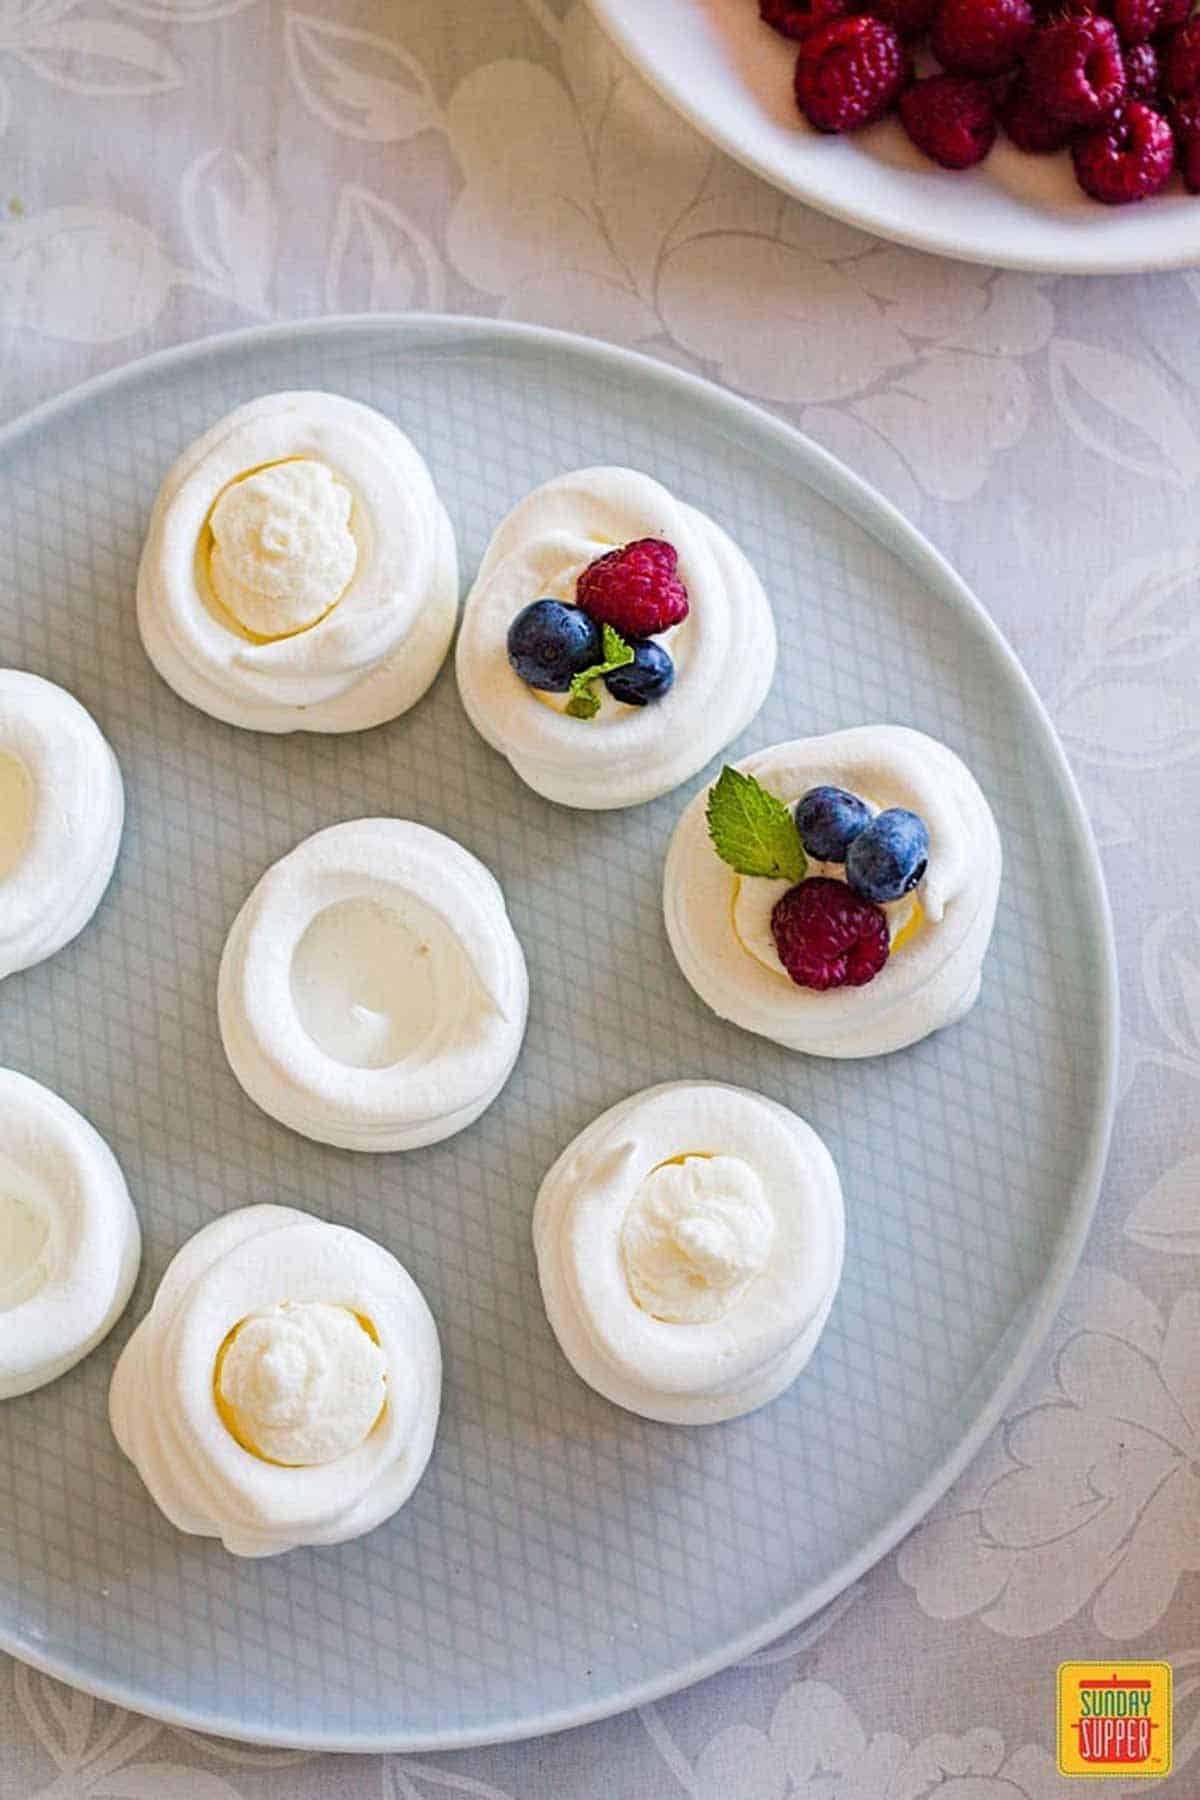
- Pipe the meringue onto the prepared tins. First pipe a small circle about 1.5-2" in diameter and then pipe rings on top of it, around the edges, in order to form a well.
- Put one baking tin at a time in the oven and immediately lower the temperature to 245°F.
- Bake for 30 minutes, and then lower the temperature to about 200°F.
- Bake until the meringue is dry when touched carefully. Turn off the oven and open the door halfway. Leave the meringues inside to cool down. This will prevent the temperature change from being too drastic and causing the meringue to crack.
- Let the pavlova cool entirely before moving on to the filling!
Individual Pavlovas Filling
- In a large mixing bowl, beat the mascarpone with powdered sugar and vanilla until smooth. In another large bowl, whip the cream until thick. Using a rubber spatula, gradually add the whipped cream to the mascarpone, folding it in vs using a mixer. This will help keep it fluffy and creamy!
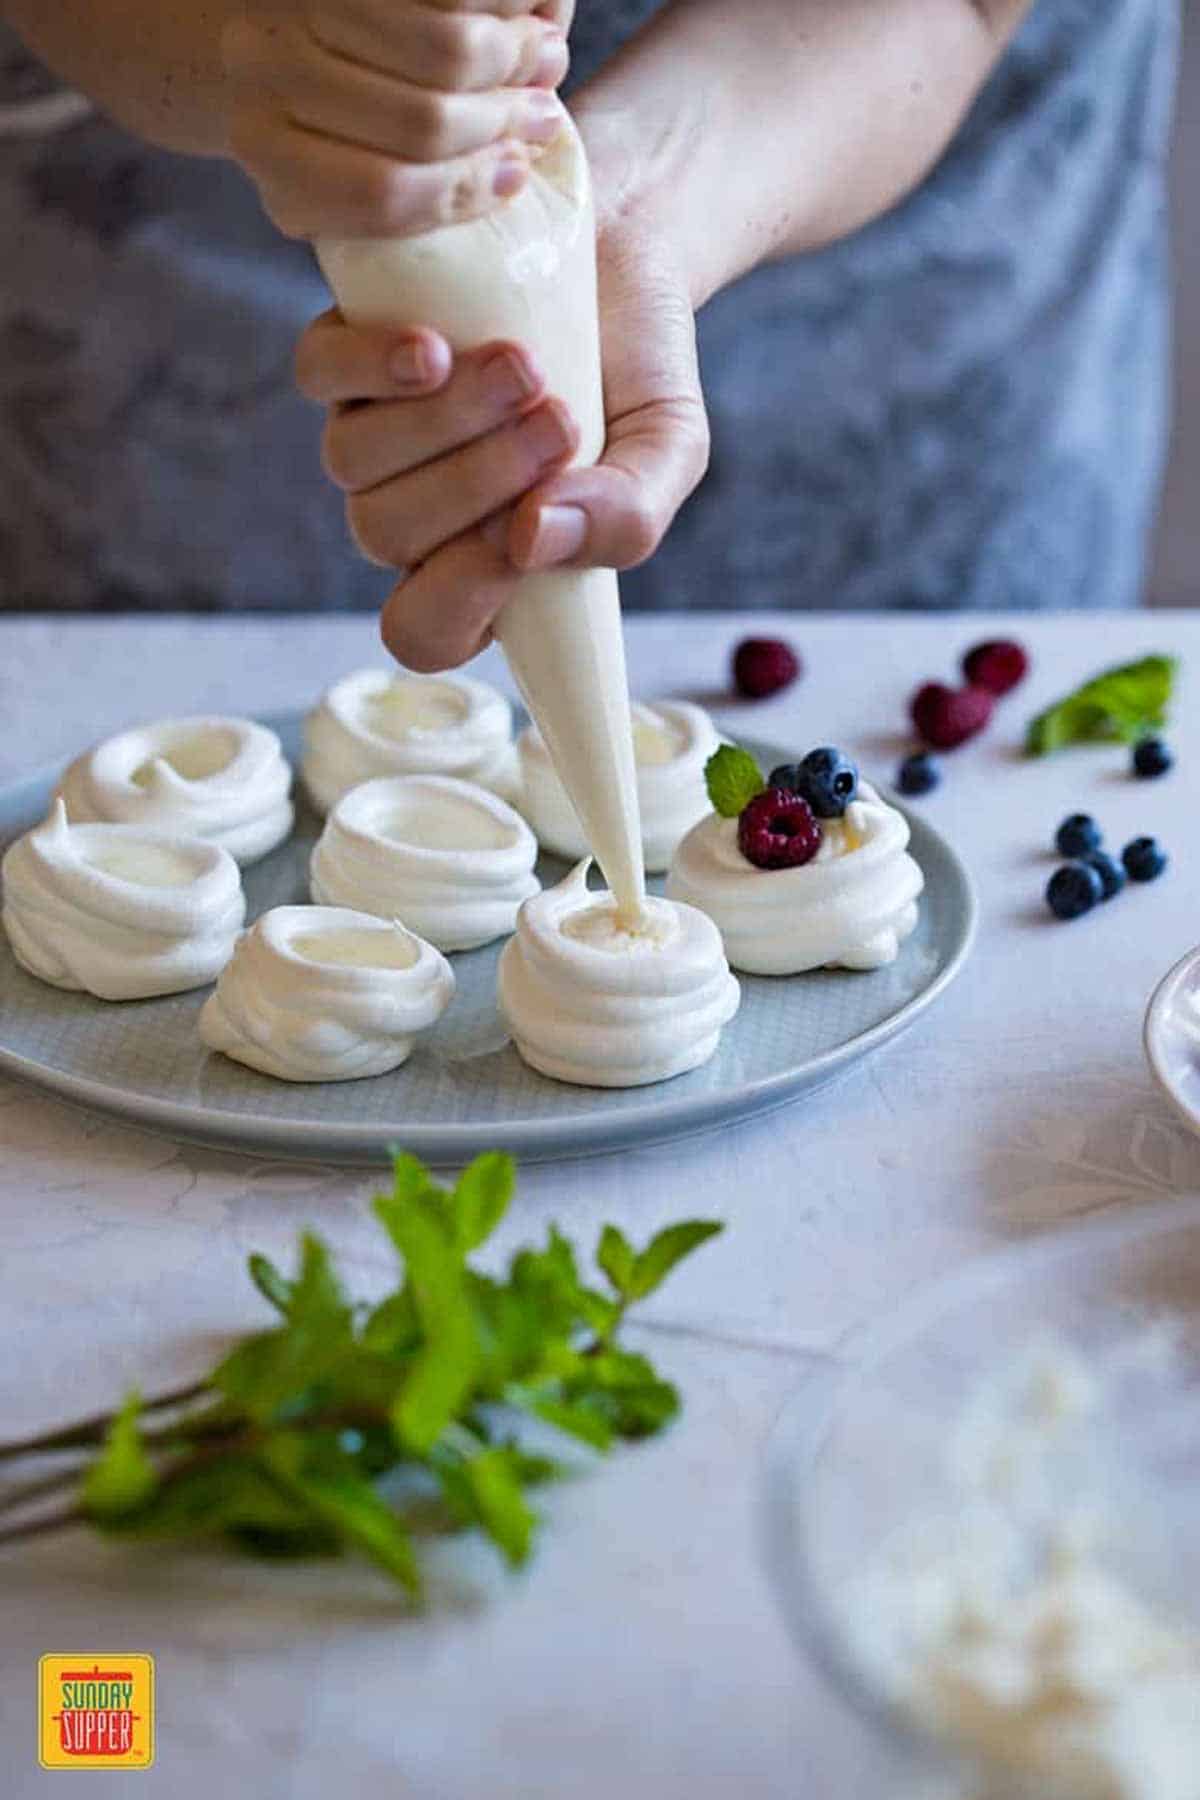
- Pipe or spoon the filling into the holes of the baked mini pavlovas. Top with fresh berries and mint leaves.
- Serve immediately.
This recipe is perfect in every way, very thorough and tasty!
Iva
Pavlova Recipes Tips
- Baking properly is the key. For perfect pavlova bites with no cracks or burns, bake them at a low temperature. The best thing to do is to preheat the oven to a higher temperature, and then gradually lower it during the baking until you switch the oven off.
- Don’t take the baking pan out immediately! You need to leave the mini pavlovas inside the oven to cool down, with the door open halfway. This is the best way to avoid cracks in your pavlova meringue.
- Add the topping and the decoration right before serving, otherwise, the meringue will get soggy from the moisture.
- If you do not have a piping bag, you can make one by cutting the end of a large plastic bag. Or, you can use a spoon. You do not need a piping tip for this mini pavlova recipe.
- Discard any egg that splits. If the yolk breaks, it will add oil to the entire egg and make it impossible to whip up. Make sure to thoroughly clean the bowl or cup you're using to separate out egg whites every time a yolk breaks, as invisible oil can cling to the sides.
- You cannot make pavlova in a convection oven unless you turn off the convection setting! The fan is too powerful and will blow away the meringue.
How to Separate Egg Whites from Yolks
This recipe calls for egg whites. To separate egg whites from the yolks, follow one of these methods. Note: keep eggs chill before cracking. It's easier to separate egg whites from cold eggs.
- Crack the egg into your hand over a bowl. Catch the yolk with your palm and let the white drip into the bowl.
- Alternatively, crack the egg across the widest part of the shell. Break in half over the bowl and tilt the egg halves back and forth to catch the yolk in one half and allow the white to drip out into the bowl.
- Or, you can crack the egg onto a slotted spoon. The yolk will catch on the spoon and allow the white to drip through into the bowl.
- Always separate eggs one at a time! Pour each egg white into a large bowl before cracking the next egg. That way, if one egg yolk splits, you won't ruin the entire bowl.
- After separating the egg whites, put them back in the fridge. Room temperature egg whites don't beat well. Using cold egg whites will result n a much better texture.
FAQ
You can make the meringue a day ahead of time, although we recommend making them the day of or no earlier than the day before for best results. While meringue cookies last well, pavlova is softer and more moist, meaning it has a very short shelf life.
You can store the baked meringues outside of the refrigerator at room temperature in an airtight container if you would like to make them ahead of time and have them ready to serve.
Store the filling separately from the meringues.
Fill the pavlovas when ready to serve, otherwise they will get mushy.
Cornstarch should not be omitted from this recipe - it is necessary to make the pavlova meringue as light and crisp as it is with a fluffy inside. If you need to use a substitute, use potato starch.
Love this recipe! It’s my new go-to!
Lisa
Optional Toppings
- Blueberries
- Blackberries
- Strawberries
- Raspberries
- Peach slices
- Mango
- Apricots
- Kiwi slices
- Lemon curd
- Fruit preserves or jam
You can use whatever fruit you like to top your bite-size pavlovas. I love fresh berries, but other fresh fruits make delicious additions as well.
Bite Size Desserts for Parties
Mini pavlovas are a perfect ending to a holiday meal. I love serving pavlova bites when I entertain for the holidays, especially after a gorgeous slow-roasted prime rib or standing rib roast.

Mini Pavlova Recipe
Ingredients
Pavlova Meringue:
- 4 egg whites
- 1 cup caster sugar
- ½ tsp. cream of tartar
- 1,5 tsps. cornstarch
- 2 tsps. vanilla extract
Mascarpone Filling:
- 1 cup mascarpone
- 1 cup whipping cream - cold
- 2 tbs powdered sugar
- 1 tsp. vanilla extract
- fresh berries
- mint leaves - (optional)
Instructions
Pavlova Meringue
- Preheat oven to 320°F. Line two baking tins with parchment paper.
- In a large mixing bowl, using an electric mixer at high speed, beat the egg whites until soft peaks form. You can also use a stand mixer with a whisk attachment.4 egg whites
- Gradually add the sugar and the cream of tartar and keep beating at high speed. Add the cornstarch and vanilla extract. Beat until stiff peaks form.1 cup caster sugar,½ tsp. cream of tartar,1,5 tsps. cornstarch,2 tsps. vanilla extract
- Scrape the meringue into piping bags, or a ziplock bag with a corner cut out.
- Pipe the meringue onto the prepared tins. First pipe a small circle about 1.5-2" in diameter and then pipe rings on top of it, around the edges, in order to form a well.
- Put one baking tin at a time in the oven and immediately lower the temperature to 245°F.
- Bake for 30 minutes, and then lower the temperature to about 200°F.
- Bake until the meringue is dry when touched carefully. Turn off the oven and open the door halfway. Leave the meringues inside to cool down. This will prevent the temperature change from being too drastic and causing the meringue to crack.
- Let the pavlova cool entirely before moving on to the filling!
Mascarpone Filling
- In a large mixing bowl, beat the mascarpone together with powdered sugar and vanilla until smooth.1 cup mascarpone,1 tsp. vanilla extract,2 tbs powdered sugar
- In another large bowl, whip the cream until thick. Then, using a rubber spatula, gradually add the whipped cream to the mascarpone, folding it in instead of stirring.1 cup whipping cream
- Pipe or spoon the filling into the holes of the mini pavlovas. Top with fresh berries and mint leaves. Serve immediately.mint leaves, fresh berries
Notes
- Baking properly is the key. For perfect pavlova bites with no cracks or burns, bake them at a low temperature. The best thing to do is to preheat the oven to a higher temperature, and then gradually lower it during the baking until you switch the oven off.
- Don’t take the baking pan out immediately! You need to leave the mini pavlovas inside the oven to cool down, with the door open halfway. This is the best way to avoid cracks in your pavlova meringue.
- Add the topping and the decoration right before serving, otherwise, the meringue will get soggy from the moisture.
- If you do not have a piping bag, you can make one by cutting the end of a large plastic bag. Or, you can use a spoon. You do not need a piping tip for this mini pavlova recipe.
- Discard any egg that splits. If the yolk breaks, it will add oil to the entire egg and make it impossible to whip up. Make sure to thoroughly clean the bowl or cup you're using to separate out egg whites every time a yolk breaks, as invisible oil can cling to the sides.
- You cannot make pavlova in a convection oven unless you turn off the convection setting! The fan is too powerful and will blow away the meringue.
Kristen Chidsey says
This looks just perfect! So dainty!
Mary Bostow says
Will be making this for sure this week. Thank you so much for all the attention to detail and all the tips. I know it will be a success since it is from you. When I make them will be sure to come back and rate the recipe. PS Gorgeous pictures!
Em Beitel says
Thank you so much, Mary! That is so kind of you to say. We hope you love it, and can't wait to hear how it goes!
Cindy @ A Uniquely Edible Magic says
These mini pavlovas are so adorable! A whole lot better than the actual gigantic one, in my opinion :p
Em Beitel says
Thank you, Cindy! We love these small pavlovas - there's something so appealing about a small bite dessert like this!
Beth Pierce says
What a delicious dessert! Looks like it came straight from the bakery window! Delish!
Em Beitel says
Thank you so much, Beth!
Traci says
I'm loving this idea! Perfect for parties and holiday gatherings...thanks for sharing!!!
Em Beitel says
Thank you so much, Traci! We love these for parties!
Katherine says
These mini pavlovas look so cute!
Em Beitel says
Thank you so much, Katherine!
Lisa says
If I make these 2 days before I use them, do they need to be refrigerated?
Em Beitel says
Hi Lisa! You can store the meringues in an airtight container (make sure it's tightly sealed) outside of refrigeration and they should be fine, but we recommend filling them with the whipped topping just before serving, instead of ahead of time, so they don't become mushy!
Jen says
If I made these to take to a party should I wait to fill once we arrive? If they are set out for people to pick at, would they be soggy in 30 minutes or so?
Em Beitel says
Hi Jen! Thank you so much for your question! Yes, you should definitely wait to fill them until they're ready to be enjoyed. If they're going to be sitting out for guests to pick at and you're worried they might get soggy, I would recommend maybe having a bowl of the whipped topping near the meringues so your guests can spoon them in and perhaps pick out their berry toppings! However, as long as you're in a cool, dry location, they should be fine. They're honestly so yummy, they probably won't last long enough with your guests to get soggy!
Kaitlin says
Does the recipe change very much if I have 6 egg whites instead of the 4?
Em Beitel says
Hi, Kaitlin! Thank you for your comment. Yes, all other ingredients would have to be adjusted, as changing to 6 egg whites instead of 4 would affect the consistency of the pavlova. We recommend using the 4 egg whites in the recipe and not adjusting to 6.
Kari M. says
Can you make the filling ahead of time, like a day or two before, but not fill the shells until right before serving?
Em Beitel says
Hi Kari! Yes, absolutely. That should work just fine. Just store the whipped topping in an air-tight container in the refrigerator until you're ready to use it for those couple of days. What are you making them for? Let us know how it goes for you!