This post may contain paid links. See more info on my privacy page.
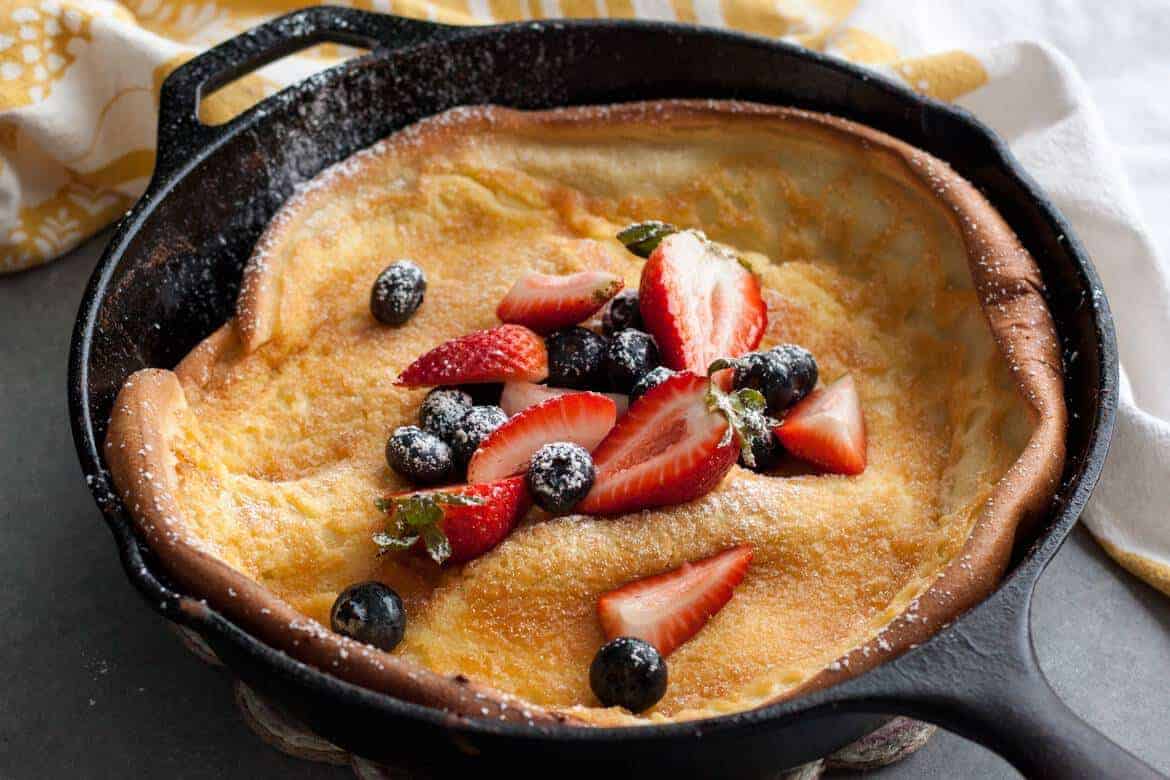
My quick and easy Dutch Baby Pancake with berries and cream is ready in less than 30 minutes for a delicious, filling breakfast everyone loves. Top it off with homemade whipped cream, and it makes the perfect treat to start the day with a smile!
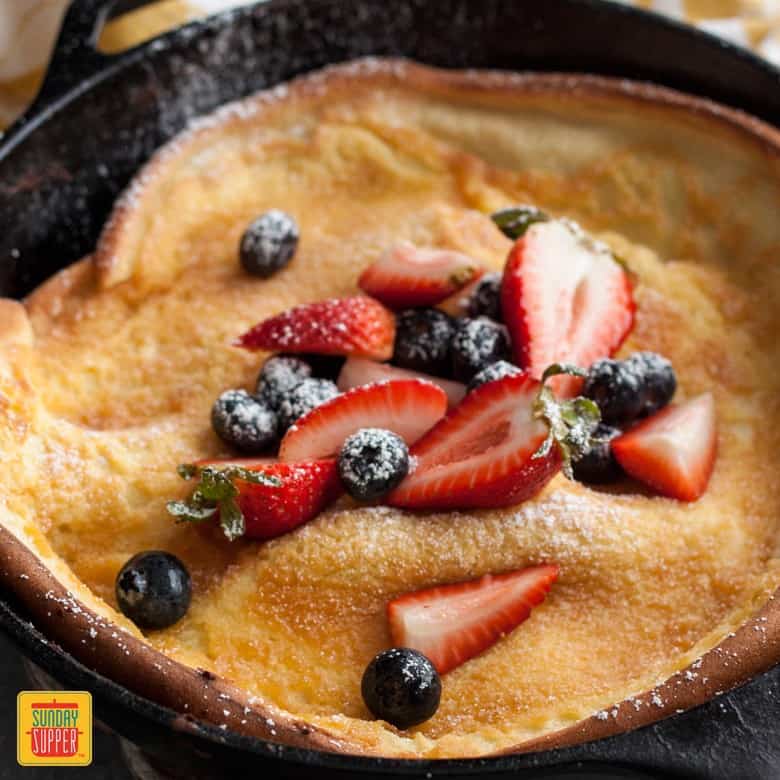
Fluffy German Pancakes to Wake Up To
According to my mom, the biggest struggle she faced with me when I was a child was getting me out of bed in the morning. When the skies were grey and the wind was chilly, something inside me turned to cement, and I would not be moved from under the warm covers!
That is, until she pulled out her secret weapon: the irresistible aroma of a freshly baked Dutch pancake wafting into my room. Suddenly I'd never been more awake in my life!
Needless to say, it's a trick I've been using on my kids and grandkids ever since, and it never fails. All it takes is one sniff of this incredible crispy-yet-tender dutch baby pancake recipe to be ready to face the day. Top it with some whipped cream and fresh berries (sometimes I like to make berry compote for an extra-fancy breakfast), and you'll have a decadent treat ready to start the day right.
Jump to:
What You'll Love About My Recipe
- It's super simple: With a blender or whisk, you can whip up this easy batter in a matter of minutes!
- Customizable: Because the berries and cream are added at the end, you can add any toppings you'd like without changing the recipe!
- Perfect Base for Savory Pancakes: Looking for a savory option? Leave out the orange zest and vanilla, and add a handful of shredded cheese and some sliced bacon or cubed ham right into the batter.
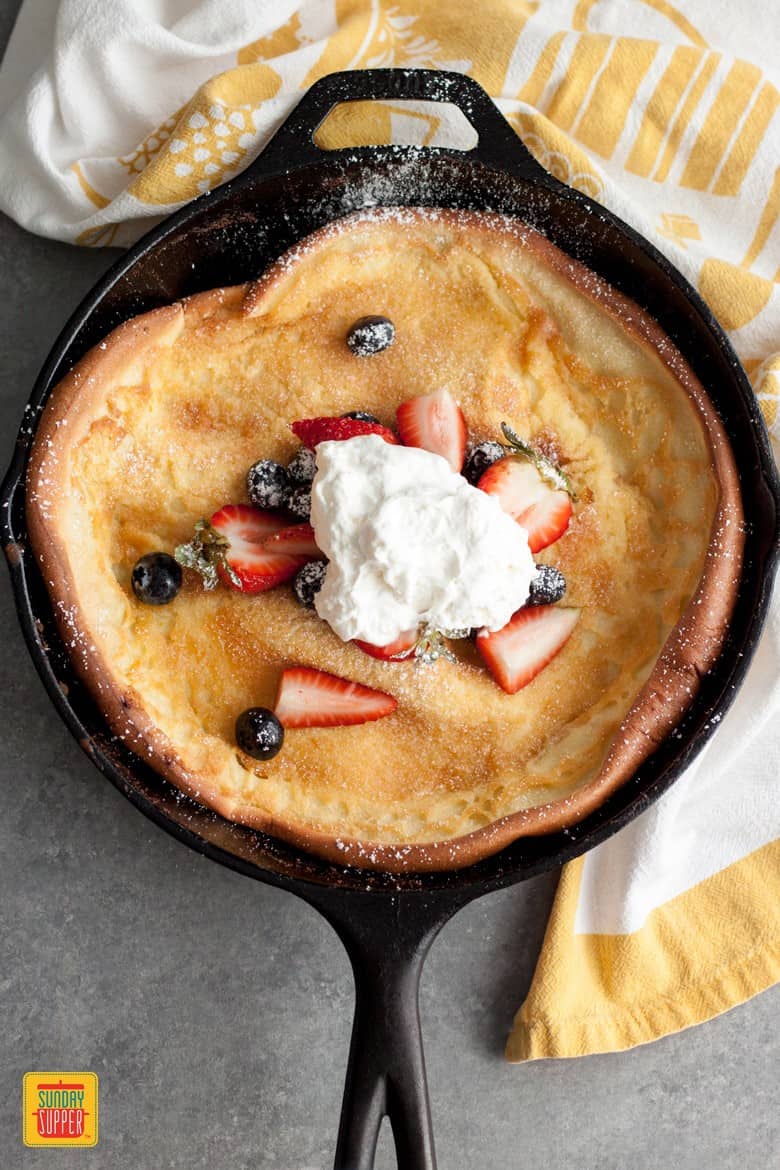
What is a Dutch Baby?
Also known as a German pancake, a Belgian pancake, a Dutch puff, or a Bismarck, a Dutch Baby is a custard-like pancake made with lots of eggs and a comparatively small amount of flour. Baked in the oven in a cast-iron pan, it has a similar texture and appearance to a popover or Yorkshire pudding, just bigger!
What's in a Dutch Baby Pancake?
- All Purpose Flour (Substitutions Available): You might notice there's not a lot of flour compared to the other ingredients! This is because Dutch pancakes are almost like a baked custard or pudding; they're mostly eggs! To make a gluten free dutch baby, just swap it out for your favorite gluten free flour blend.
- Milk: I recommend whole milk, as the fat content will bring out the best in the flavor!
- Eggs: The eggs are really the star of the show in a German pancake. Use the best quality large eggs you can find; I like getting pasture-raised when I can. The yolks will be much more rich!
- Sugar: Plain white sugar helps bring just a bit of natural sweetness to this pancake! You don't need to overdo it; you'll be adding more sweetness with toppings.
- Vanilla: Pretty much every sweet topping tastes better with a little vanilla! You can use vanilla extract, paste, or Mexican imitation vanilla.
- Butter: Unsalted or salted butter will work great, but if you use salted, use less salt in the batter itself.
- Salt: You can't serve a sweet treat without a pinch of salt! You don't need fancy salt for this; just use whatever you have.
- Orange zest: My secret ingredient for the best Dutch baby? Use some orange zest! It brings out a delightful aroma that complements just about every topping you can dream of. It's so good with the berries!
Note: For full ingredient measurements, scroll to the recipe card below. Keep reading on for tips and more!
Dutch Baby Toppings
The Dutch Baby is just a canvas for toppings, so get creative! My favorite is Fresh strawberries, raspberries, and homemade whipped cream, which I've included in the recipe card below. But you can also use thinly sliced apples caramelized in the pan with extra nutmeg and cinnamon, or even make a chocolate chip pancake with cocoa powder and a scattering of chocolate chips and powdered sugar on top!
How to Make Dutch Baby Pancakes
- Enhance the orange zest by adding it to a small bowl with the sugar and mixing it up until it's fragrant and starting to turn orange. This allows the sharp granules of sugar to work the oil out of the zest, which will greatly enhance the flavor.
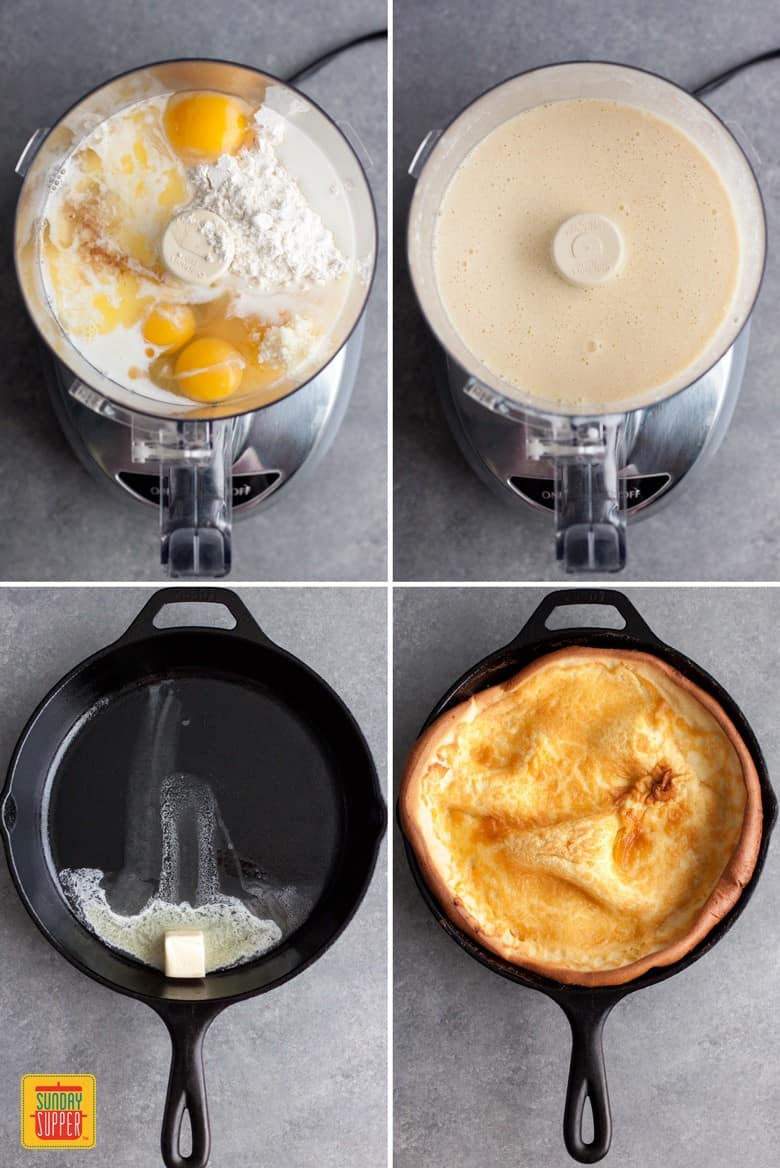
- Mix the dry ingredients. Add the flour, salt, and mixed orange zest and sugar to a bowl, and mix them until evenly incorporated. Then melt the butter in a cup in the microwave for about 30 seconds.
- Add the ingredients to a blender. First pour in the dry ingredients, then crack in the eggs, pour in the melted butter, and add the milk and vanilla.
- Blend for about 30 seconds, or until fairly evenly mixed. If you don't want to use a blender, you can also do this step in a large bowl with a whisk! Keep mixing until it's fairly smooth.
- Rest the batter. I always want to pour it into a pan right away, but it's best to let the batter rest for at least 30 minutes. If you want, you can make it ahead and let it rest overnight in the fridge, too!
- Preheat the oven to 425°F, and place a 10-inch cast iron skillet in the oven to heat.
- Remove the pan from the oven and add the butter. Make absolutely sure to use thick oven mitts when you remove the pan; it'll be blazing hot! The butter might bubble and sizzle when it hits the hot skillet, so keep your face far from it. Once melted, swirl it around the pan so it coats the sides as well as the bottom.
- Pour the batter into the pan, then bake it for 20 minutes. Once the pan is back in the oven, don't open the oven door again! You want to capture the heat so there's no chance of the pancake deflating.
- Prepare your toppings. Use the baking time to whip up heavy whipping cream in a bowl with an electric hand mixer (or a whisk and a lot of elbow grease!). Add a little sugar and vanilla for better flavor.
- Remove from the oven and top! The pancake will deflate a bit when removed; this is normal! Use it like a bowl to fill with whipped cream and fresh berries. Then slice, plate, and serve with maple syrup! And remember, the pan will still be hot!
Also try...
Breakfast Recipes You'll Love
- Strawberry Crisp
- Sheet Pan Pancakes
- Sausage Breakfast Casserole
- Breakfast Sliders
- Stovetop Biscuits and Gravy
Isabel's Tips
- Remember to protect your hands! Cast iron pans get super hot and can burn you through thin protection like towels or thin oven mitts. Make sure to use nice thick mitts to ensure you don't get burned!
- Don't over-mix the batter! Blend it for no more than 30 seconds, or if using a whisk, just blend until no large lumps remain.
- Use a cast iron pan if you have one! If you don't have a cast iron pan, use any metal or ceramic oven-safe skillet you have; a Dutch oven will work, too. I don't recommend using nonstick pans as those can be coated in substances that start peeling at high temperatures.
- Make sure to swirl the butter around the edges of the pan. If you don't, the pancake can stick, and you don't want to lose any of those decadent crisp edges!
- It's normal for the pancake to deflate! Don't worry if that glorious puffy pancake gets kind of flat; this is intended.
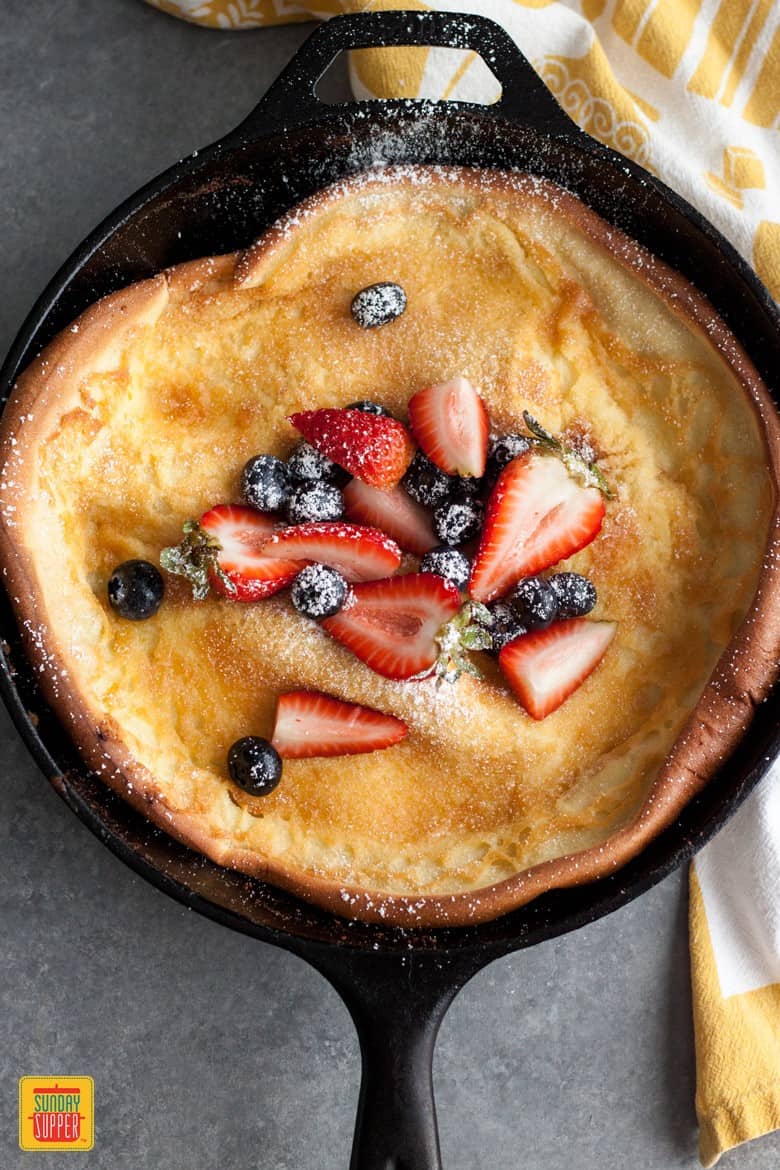
How to Store Leftover Pancakes
- Fridge: You can store leftover Dutch Baby in the refrigerator in an airtight container, or on a plate wrapped in plastic wrap or aluminum foil, for up to 4 days.
- Freezer: You can freeze Dutch Babies! Just wrap them rightly in plastic wrap or place them in a freezer-safe plastic bag, then freeze for up to 3 months.
- Thawing and Reheating: Thaw a frozen Dutch Baby in the fridge overnight. To reheat, heat in the microwave for about 30-45 seconds, or place in the oven at 400°F for 8-10 minutes. It won't be quite as crispy, but it'll still be totally delicious.
- Make-ahead: You can prepare the batter early for make-ahead Dutch pancakes! Just blend up the batter, then store it in the fridge for up to 24 hours. Pop it into a hot pan and bake for no-prep breakfast!
FAQ
You don't! Dutch Babies are supposed to deflate, and will pretty much always do so once they leave the heat of the oven. If your Dutch Baby doesn't deflate, it might mean the batter was over-mixed.
You can absolutely make German pancakes without a cast-iron skillet, but the crisp of the edges may suffer for it. To make it without a cast-iron pan, use a Dutch oven or stainless steel oven-safe skillet. I don't recommend a nonstick skillet as they can be damaged by high heat.

Easiest Ever Berries and Cream Dutch Baby
Equipment
Ingredients
For the dutch baby
- ⅔ cup all purpose flour
- ¼ cup granulated sugar
- 1 teaspoon orange zest - about half an orange
- ⅛ teaspoon kosher salt
- 3 large eggs
- ⅔ cup whole milk
- ½ teaspoon pure vanilla extract
- 4 tablespoon unsalted butter - divided
For whipped cream
- ½ cup heavy whipping cream
- 1 tablespoon sugar
- 1 splash pure vanilla extract
For toppings
- Fresh strawberries and blueberries or a mix of your choice
- Powder sugar
- Maple syrup - optional
Instructions
- Enhance the orange zest by adding it to a small bowl with the sugar and mixing it up until it's fragrant and starting to turn orange.1 teaspoon orange zest,¼ cup granulated sugar
- Mix the dry ingredients. Add the flour, salt, and mixed orange zest and sugar to a bowl, and mix them until evenly incorporated. Then melt the butter in a cup in the microwave for about 30 seconds.⅔ cup all purpose flour,⅛ teaspoon kosher salt,4 tablespoon unsalted butter
- Add the ingredients to a blender. First pour in the dry ingredients, then crack in the three eggs, pour in the melted butter, and add the milk and vanilla.3 large eggs,⅔ cup whole milk,½ teaspoon pure vanilla extract
- Blend for about 30 seconds, or until fairly evenly mixed. If you don't want to use a blender, you can also do this step in a large bowl with a whisk! Keep mixing until it's fairly smooth.
- Rest the batter. This is the step I'm the worst at; I always want to pour it into a pan right away! It's best to let the batter rest for at least 30 minutes, up to overnight.
- Preheat the oven to 425°F, and place a 10-inch cast iron skillet in the oven to heat.
- Remove the pan from the oven and add the butter. The butter might bubble and sizzle when it hits the hot skillet, so keep your face far from it. Once melted, swirl it around the pan so it coats the sides as well as the bottom.
- Pour the batter into the pan, then bake it for 20 minutes. Once the pan is back in the oven, don't open the oven door again!
- Prepare your toppings. Use the baking time to whip up heavy whipping cream in a bowl with an electric hand mixer (or a whisk and a lot of elbow grease!). Add a little sugar and vanilla for better flavor.½ cup heavy whipping cream,1 tablespoon sugar,1 splash pure vanilla extract
- Remove from the oven and add toppings! The pancake will deflate a bit when removed; this is normal. Use it like a bowl to fill with whipped cream and fresh berries. Then slice, plate, and serve with maple syrup!Fresh strawberries and blueberries or a mix of your choice,Powder sugar,Maple syrup
Notes
- Remember to protect your hands! Cast iron pans get super hot and can burn you through thin protection like towels or thin oven mitts. Make sure to use nice thick mitts to ensure you don't get burned!
- Don't over-mix the batter! Blend it for no more than 30 seconds, or if using a whisk, just blend until no large lumps remain.
- Use a cast iron pan if you have one! If you don't have a cast iron pan, use any metal or ceramic oven-safe skillet you have; a Dutch oven will work, too. I don't recommend using nonstick pans as those can be coated in substances that start peeling at high temperatures.
- Make sure to swirl the butter around the edges of the pan. If you don't, the pancake can stick, and you don't want to lose any of those decadent crisp edges!
- It's normal for the pancake to deflate! Don't worry if that glorious puffy pancake gets kind of flat; this is intended.


Warren Veale says
You have a wonderful capability to engage with your readers intellectually.
Isabel Laessig says
Warren, this made my day. Thank you very much for such a kind comment.